Stay alert and be ready to act any second, for the pirates are far superior in numbers and cunning. Our resources have been severly compromised at various locations and are dwindling at an alarming rate. Our losses are piling up much faster than we can reduce their numbers. This is a dire situation indeed.
Instance Information
Quest: Destroy all enemy warships in this round.
- Max Players: 1
- Max Fleets: 5
- Checkpoints: 1
- Exp: 1540
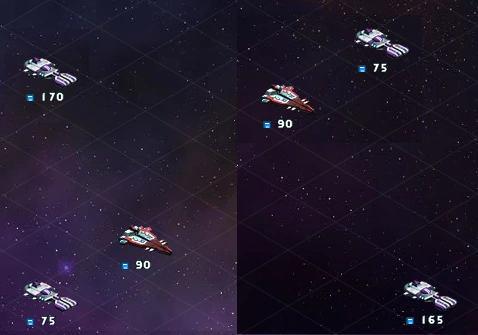
Enemy Units
2 x 6-Laser Fleet
- Ships: 90 x RV269 Nettle-II in 9 groups (10 in each slot)
- Commander: Angla-A Lv 6, Max Range, Closest Target
1 x 10-Laser Fleet
- Ships: 135 x Tiaz Diaz-II battleships in 4 groups (45/30/30/30), 30 x Def Diaz III battleships in 3 groups (10/10/10)
1 x 11-Missle Fleet
- Ships: 90 Nadesico Valkyrie-II frigates in 3 groups (30/30/30), 80 x Def Diaz-III battleships in 4 groups (20/20/20/20)
- Commander: Angla-A Lv 6, Max Range, Max Attack Power
2 x 8-Ship-Based Fleet
- Ships: 70 Wanderer-A Air Wanderer-III frigates in 5 groups (15/15/20/10/10), 5 x Def Diaz-III battleships
- Commander: Angla-A Lv 6, Max Range, Max Durability
Reward
![]() Lv4 Treasure Box:random chance of having one of the following items.
Lv4 Treasure Box:random chance of having one of the following items.
-
 2000 - 3000 (30% chance)
 - 2000 - 3000 (30% chance)
- 2000 - 3000 (30% chance)
- Valkyrie (Blueprint) - Frigate (3.3% chance)
- Duke (Blueprint) - Cruiser (3.3% chance)
- Diaz (Blueprint) - Battleship (3.3% chance)
Strategy
As before, you will be attacked from all sides on round one.
Our first encounter with enemy SB-fighters ; the Wanderer-As are slow and attack from long range your most durable fleet. We can use this to our advantage, by deploying a decoy tank fleet to draw their fire. You can overcome their range advantage by forming your own attack fleet fast enough to destroy them early on, whilst the enemy fighters are still engaging your tanks.
The laser fleet with the Tiaz battleships is a serious threat, having stacks that can inflict 62k and 42k heat damage respectively. Their Neutralizing armor and Powered Pulse Cannons means using magnetic, missile or SB-weaponry against them is a bad idea. Taking them out should be a priority.
All the other enemy fleets we have seen before and bested in the previous instance, so we know how to deal with them by now.
Recommended Builds: The same ships we used in i3 should work well in this instance. Just use more of them so as to take down the Tiaz fleet quickly. You should also research the Pulse Laser Transmitter and use it to upgrade our existing Nettle design. Build 375 x the new TankKi-Mk2 Nettle battleships. If you have been following the wiki recommendations, this should give you a total of 600 Nettles, 375 Nettle Mk2 and 240 Wiekes.
Deploy the ships in three fleets in the following order. The 3rd fleet will deploy closest to and engage the Tiaz laser fleet and draw fire from both enemy missiles and fighters, whilst the first two move to destroy the Wanderer-As. If fleet #3 is taking too much damage, try adding some more Nettle-Mk2s to the front row.
Fleets #1 & 2 Orders: max range/min durability 1st File 2nd File 3rd File Attack Power 1st Rank - 75 Nettles - 100% 2nd Rank 75 Nettles 120 Wiekes 75 Nettles 90% 3rd Rank - - - 75%
Fleet #3 Orders: max range/max durability 1st File 2nd File 3rd File Attack Power 1st Rank 75 Nettle Mk2 150 Nettle Mk2 75 Nettle Mk2 100% 2nd Rank 75 Nettles 75 Nettle Mk2 75 Nettles 90% 3rd Rank - - - 75%