This defensive system was a legend in its time, fortified by the best technology then available. The empire behind its design may have long ago perished, but the system that remains today is still a formidable barrier capable of deterring potential aggressors.
Instance Information
Quest: Destroy all enemy warships in this round.
- Max Players: 1
- Max Fleets: 5
- Checkpoints: 1
- Exp: 1820
Enemy Units
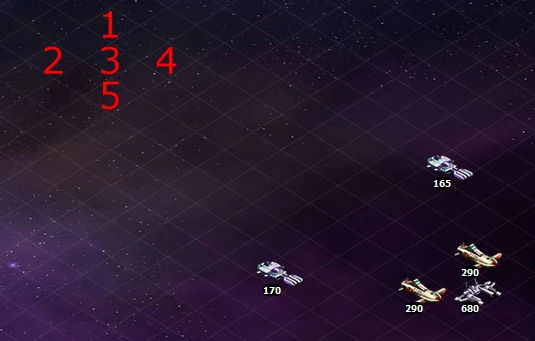
Checkpoint 1
If you where able to take out instance 4 most of the fleets in this instance are not much of a threat. the 19-Missle fleet however is a serious concern. Its center row has 180 ships each equipped with a lot of Refined Rocket Frame-III missile launchers. Most fleets that have gotten this far in the instances can not handle this kind of firepower. It is also guarded by a wall of Tanky Diaz-III battleships. This fleet is set to attack your strongest unit, make sure this unit has strong defenses in its front row and make sure it takes the missile hits head on. Destroy this unit fast so it can't shoot twice, it has a long reload.
1 x 11-Missle (Fleet)
- Ships: 90 Valkyrie-II Frigate in 3 groups (30/30/30), 80 x Diaz-III Battleships in 4 groups (20/20/20/20)
- Armaments: 4 x Rocket Booster-III
- Defenses: 2 x Heat Diffusion Shield-III, 2 x Particle Stun Shield-III, 2 x Anti-Aircraft Cannon-III, Daedalus Control System-I, 3x EOS Phase Shift Shield-III,
- Commander: Angla-A Lv 6, Max Range, Max Attack Power
The Valkyries are the missile boats while the Diaz-III ships are simply tanks with a tonne of structure to take hits.
1 x 10-Laser (Fleet)
- Ships: 135 Diaz-II Battleships in 4 groups (30/30/30/45), 30 x Diaz-III Battleships in 3 groups (10/10/10)
- Armaments(Diaz-II): 9 x Pulse Laser Transmitters-III
- Armaments(Diaz-III): None, they are tanks but for some reason in the back row.
- Defenses(Diaz-II): 2x Power pulse Cannon
- Defenses(Diaz-III): Daedalus Control System-I, 3x EOS Phase Shift Shield-III,
- Commander: Angla-A Lv 6, Max Range, Closest Target
2 x 13-Ballistic (Fleet)
- Ships: 240 The Shuttle-III Cruiser in 8 groups (3 each), 5 x Diaz-III Battleships in 1 group (center)
- Armaments: 8 x "Wiseman" Scatterbomb-III
- Defenses(The Shuttle): 1 x Particle Stun Shield-III, 1x Space-Time Magnetic Shield-III, 1x Detonation Shield-III
- Defenses(Diaz-III): Daedalus Control System-I, 3x EOS Phase Shift Shield-III,
- Commander: Angla-A Lv 6, Min range, Closest Target
These guys die easy and never got in range to do anything usefull during testing.
1 x 19-Missle (Fleet)
- Ships: 270 Diaz-III Battleships in 3 groups (90/90/90), 380 x Space Hunter-III Frigates in 4 groups (80/100/100/100)
- Armaments (Space Hunters): 5x Refined Rocket Frame-III, 2x Refined Rocket Frame-II, 1x Refined Rocket Frame-I
- Armaments (Diaz): None
- Defenses(Diaz-III): 3x EOS Phase Shift Shield-III, Daedalus Control System-I,
- Derenses(Hunters): 2x EOS Phase Shift Shield-III, 1x Particle Pulse Cannon-III,
- Commander: Angla-A Lv 6, Max Range, Max Attack Power
The missile boats in this fleet are Identical to the Hunter ships from tab 3 of the corps mall. 1qazxsw23edcvfr4
Reward
![]() Lv5 Treasure Box:random chance of having one of the following items.
Lv5 Treasure Box:random chance of having one of the following items.
-
 6000 - 8000 (30% chance)
 - 6000 - 8000 (30% chance)
- 6000 - 8000 (30% chance)
- Missile Interception (Blueprint) - Air-defense (3.3% chance)
- Heat Diffusion Shield (Blueprint) - Shield (3.3% chance)
- Orbital Shield (Blueprint) - Shield (3.3% chance)